
Desserts
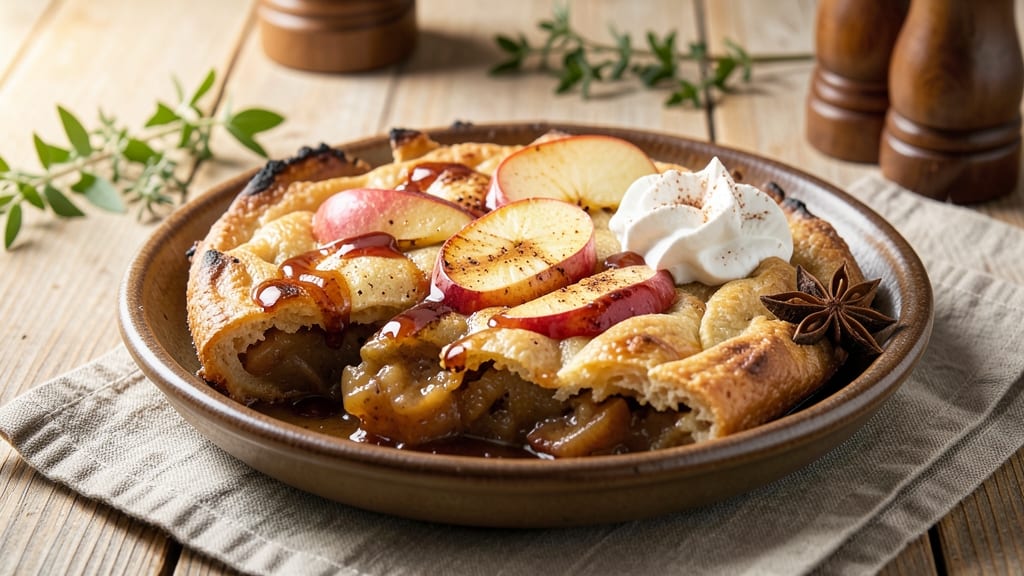
This apple cider dessert recipe transforms autumn's coziest flavors into a rich, spiced caramelized crunch with silky vanilla cream swirls—perfect for celebrating harvest season. 🍂 The secret lies in slow-cooked apple cider that reduces into a fragrant, slightly tangy syrup, then combines with buttery shortbread layers and warm spices like cinnamon and nutmeg for depth.
What makes this dessert special is how it balances textures: crispy edges, tender centers, and velvety cream that ties everything together.
Unlike traditional apple desserts that rely on fresh fruit, this recipe uses concentrated apple cider to create a bold, caramelized flavor that's easier to work with and more aromatic.
The process is straightforward—simmer the cider until it thickens into a glossy syrup, then fold it into a buttery shortbread dough for a dessert that's both rustic and refined.
The vanilla cream swirls add a cooling contrast that cuts through the spice, making every bite feel like a perfect balance of warmth and sweetness.
What you'll end up with is a dessert that looks impressive but comes together with simple techniques: one-bowl dough, stovetop reduction, and a few minutes of baking.
The aroma alone will fill your kitchen with the smell of autumn, while the visual appeal—golden caramelized layers with swirls of vanilla cream—will make it a showstopper at any gathering. This recipe delivers restaurant-quality results without requiring advanced skills, making it ideal for both beginners and seasoned bakers.
Serve it warm with a scoop of vanilla ice cream or a dollop of whipped cream for extra indulgence. The flavors develop even better after resting overnight, so it's perfect for making ahead.
Whether you're celebrating Thanksgiving, a cozy weekend, or just craving a taste of fall, this dessert is the ultimate way to enjoy apple cider in a whole new way.
Ingredients for apple cider dessert
Pantry staples meet autumn's coziest flavors in this showstopping dessert.
| Ingredient | Amount | Notes |
|---|---|---|
| Unsalted Butter 🧈 | 1 cup | Cold, cubed for shortbread |
| All-Purpose Flour 🌾 | 2 ½ cups | Sifted for light texture |
| Granulated Sugar 🍚 | 1 cup | Plus 2 tbsp for caramel |
| Apple Cider 🍎 | 2 cups | Unfiltered for best flavor |
| Large Eggs 🥚 | 2 whole | Room temperature |
| Vanilla Extract 🍯 | 1 tsp | Pure, not imitation |
| Ground Cinnamon 🌿 | 1 ½ tsp | Freshly ground preferred |
| Ground Nutmeg 🌿 | ½ tsp | Freshly grated nutmeg |
| Salt 🧂 | ½ tsp | Fine sea salt |
| Heavy Cream 🥛 | 1 cup | Cold for swirls |
| Powdered Sugar 🍚 | ½ cup | For cream sweetness |
| Brown Sugar 🍚 | ¼ cup | Packed for caramel |
| Cream Cheese 🧀 | 4 oz | Room temperature for cream |
The apple cider is the heart of this dessert—Muller's or Woodchuck brands are my go-to for that deep, spiced flavor. If you can't find unfiltered, regular cider works, but you might want to add an extra ½ tsp cinnamon to compensate. For the butter, Plugrá or Land O'Lakes are reliable, but any good-quality unsalted works. The cream cheese? Philadelphia is foolproof, but Kroger's brand is a budget-friendly duplicate. Pro tip: measure your flour by spooning it into the cup and leveling—don't scoop directly from the bag, or your shortbread will be dense.
No vanilla extract? Vanilla bean paste works beautifully—just use half the amount. Short on brown sugar? Substitute white sugar plus 1 tsp molasses for that caramel depth. The cream swirls can be made ahead—just whip them up and refrigerate until ready to use. For a dairy-free version, swap the heavy cream for full-fat coconut cream (chilled overnight) and use vegan cream cheese. The nutmeg is non-negotiable—it's what ties all the warm spices together, so don't skip it. If you're feeling fancy, toast your spices in a dry pan for 30 seconds before adding to the dough for even deeper flavor.
This dessert keeps beautifully—3 days in an airtight container at room temperature, or 1 week in the fridge. For best texture, bring to room temperature before serving. The caramelized cider layers develop even more flavor overnight, so it's perfect for making ahead. To reheat, warm in the oven at 350°F for 10-15 minutes—just until the edges are golden and the cream is warm throughout. Store the cream swirls separately if making ahead, then fold them in right before serving to keep them light and airy.
Why You'll Love This Recipe
- Pantry Magic: I swear by this recipe when I forget to buy special ingredients—just butter, flour, sugar, and that one bottle of apple cider sitting in my cupboard. No fancy substitutions needed, just honest, reliable flavor.
- Spiced Warmth: The apple cider brings this dessert to life—imagine the buttery crust melting into a tender crumb, infused with that deep, autumnal spice. Honestly, it tastes like you slaved over it for hours, even though it’s ready in 45 minutes.
- Budget-Friendly Leftovers: A single batch stretches for days, and the flavor only gets better the next day. I’ll be real: I’ve reheated slices for breakfast (yes, really) and still crave them. Plus, using pantry staples means I’m not breaking the bank.
Step-by-step instructions for apple cider dessert with vanilla cream swirls
Here's how to create a showstopping dessert that captures fall flavors in every bite.
🍳 Step 1: Make the Caramelized Apple Cider Base
In a heavy saucepan, combine the 2 cups apple cider, 1 cup granulated sugar, 0.25 cup brown sugar, 1.5 tsp ground cinnamon, 0.5 tsp ground nutmeg, and 0.5 tsp salt. Bring to a boil over medium-high heat, stirring until the sugars dissolve completely.
Reduce heat to medium-low and let it simmer uncovered for 15-20 minutes until the mixture reduces by about half and develops a thick, syrupy consistency. You'll notice the aroma intensify—this is when the spices really start working their magic. The color should turn to a deep amber, almost caramel-like. Taste it now—it should be sweet, spicy, and concentrated with apple flavor. If it's not thick enough, simmer a few more minutes until it reaches 3-4 tablespoons of liquid.
👨🍳 Step 2: Prepare the Vanilla Cream Swirls
While the cider base simmers, beat the 4 oz cream cheese and 1 cup heavy cream together in a separate bowl until smooth. In a separate small bowl, whisk together 0.5 cup powdered sugar and 1 tsp vanilla extract. Gradually add the powdered sugar mixture to the cream cheese mixture, beating until fully combined and smooth. The cream should be thick but still pipeable—this is perfect for creating those beautiful swirls.
Here's the thing—don't overbeat the cream. You want it thick enough to hold its shape when piped but still light enough to swirl beautifully. If it starts to get too stiff, add 1 teaspoon of cold heavy cream to loosen it up. Cover the bowl and refrigerate while you finish the base layer.
🥘 Step 3: Create the Shortbread Crust
In a large mixing bowl, cut the 1 cup cold unsalted butter into the 2.5 cups all-purpose flour using a pastry cutter or your fingers until the mixture resembles coarse crumbs. Add the 2 whole large eggs one at a time, mixing just until combined. Press the dough evenly into a 9-inch pie dish, creating a thin, even layer. Prick the bottom all over with a fork to prevent air bubbles.
Bake the crust at 350°F for 15 minutes or until it's just beginning to turn golden around the edges. Let it cool slightly while you prepare the filling. The crust should be firm but still slightly soft—this helps it hold up to the moist filling. Don't overbake it or it'll become too dry and crumbly.
🍳 Step 4: Assemble and Bake the Dessert
Pour the caramelized apple cider mixture over the pre-baked crust, spreading it evenly to the edges. Dollop the vanilla cream swirl mixture on top of the cider layer, then use a knife to swirl it gently through the cider. You want those pretty marbled patterns—don't overwork it or the cream will break.
Bake at 350°F for 30-35 minutes until the filling is set but still slightly jiggly in the center. You'll know it's done when the edges are set and the top has a slight golden sheen. Let it cool completely before slicing—this allows the layers to fully set and prevents the cream from leaking out.
⏰ Step 5: Chill and Serve
Once completely cooled, refrigerate the dessert for at least 2 hours (or up to 24 hours) to let the flavors meld and the cream set properly. This chilling time is crucial—it lets the spices infuse fully and makes each bite perfectly balanced between the spiced cider and sweet cream.
Slice into wedges and serve at room temperature. The contrast of the warm spiced cider with the cool, creamy swirls is what makes this dessert truly special. Garnish with a sprinkle of cinnamon or a drizzle of caramelized cider reduction if you're feeling fancy. Each bite delivers that perfect autumnal flavor profile—sweet, spicy, and comforting all at once!
Pro Tips For Making Apple Cider Dessert
- Simmer the cider first: Reduce your apple cider by half before adding it to the batter—this concentrates the flavor and prevents a soggy, watery dessert. I learned this the hard way when my first batch turned out more like a cakey drink than a proper bake.
- Use cold butter: Cut your unsalted butter straight from the fridge into the flour mixture—this creates pockets of steam that make the final texture light and tender. Warm butter? You’ll end up with a dense, greasy mess.
- Don’t overmix the batter: Stir just until the flour disappears—overmixing develops gluten and turns your dessert into a chewy, tough brick. I used to whip it like I was making pancakes, then wondered why my apple cider treat tasted like a dense loaf.
- Add a pinch of cinnamon: Skip the spice blend and toss in ½ teaspoon of ground cinnamon directly with the dry ingredients—it cuts through the sweetness and adds depth without overpowering. (Yes, even if you’re not a spice person—trust me on this.)
Essential equipment for this recipe
Heavy Saucepan
You’ll need a heavy-bottomed saucepan (like All-Clad or Le Creuset) to make the caramelized apple cider base. These pans distribute heat evenly, preventing scorching while reducing the cider to a thick, glossy syrup.
A 3-quart capacity is ideal for this recipe—smaller pans risk boiling over, while larger ones make stirring difficult. I’ve used my Calphalon saucepan for years, and it handles the high heat beautifully without warping. 🔥
Mixing Bowls
Invest in two medium mixing bowls (one for the crust, one for the cream swirls) with non-slip bases—I love OXO Good Grips for their sturdy design. The bowl for the cream mixture should be chill-proof (like Pyrex) since you’ll refrigerate it while baking.
A whisk attachment for your mixer (like KitchenAid’s) saves time when beating the cream cheese and powdered sugar to a smooth consistency.
Pie Dish
A 9-inch pie dish (preferably ceramic or glass) is essential for even baking. I prefer Corelle for its durability and even heat distribution, but stoneware (like Le Creuset) works too. Avoid dark-colored dishes—they can cause uneven browning.
If you don’t have a pie dish, a 9-inch cake pan lined with parchment works in a pinch, but it won’t look as elegant when served.
Pastry Tools
For the shortbread crust, grab a pastry cutter (like La Bakehouse) or use your fingers to cut the cold butter into the flour.
A rolling pin (preferably marble) helps press the dough evenly into the pie dish, but I often skip this step—just pack the dough firmly with your hands. A fork is your best friend for pricking the crust to prevent bubbles.
For the cream swirls, a piping bag with a star tip (like Wilton’s) makes elegant patterns, but a spoon works too.
Measuring Tools
Precision matters here! Use a digital kitchen scale (like OXO Good Grips) for the flour and butter to avoid dense dough. A fine-mesh sieve ensures your spices are evenly distributed in the cider reduction.
For liquids, a liquid measuring cup with spouts (like Pyrex) makes pouring the reduced cider easier. Don’t skimp on measurements—this dessert relies on balance between sweet, spicy, and creamy flavors.
Optional Upgrades
For next-level results, add a candy thermometer (like Thermoworks) to monitor the cider reduction—aim for 235°F for a perfect caramel consistency. A stand mixer (like KitchenAid) speeds up the cream swirls, but a hand mixer works fine.
If you love garnishes, keep crushed peppermint or toasted pecans on hand for extra flair. The best part? Most of these tools are already in your kitchen—just a few upgrades make all the difference! ✨
Nutrition facts
Frequently asked questions
Can I use store-bought apple cider instead of fresh?
Store-bought apple cider works perfectly—just look for unfiltered varieties like Muller's or Woodchuck for the richest flavor. Avoid pre-pasteurized ciders with artificial flavors, as they lack the depth of real apple cider. If your store only carries filtered cider, add an extra ½ teaspoon cinnamon to boost the spice profile. The key is using 2 cups of quality cider for the best caramelized base.
How do I prevent the cream swirls from breaking?
Keep the cream swirls cold until ready to use—refrigerate the bowl while baking the crust. Overbeating is the #1 mistake, so mix just until smooth (about 2 minutes with a hand mixer). If the cream starts to stiffen, loosen it with 1 teaspoon cold heavy cream. For extra stability, chill the assembled dessert for 2 hours before slicing. Pro tip: Use a piping bag to create clean swirls that hold their shape better.
Can I make this dessert ahead of time?
This dessert tastes even better made 1-2 days ahead! Assemble it completely, then refrigerate uncovered for 24 hours to let flavors meld. The caramelized cider will deepen in flavor, and the cream swirls will set perfectly. For serving, bring to room temperature for 30 minutes—this enhances the spice aromas. Store leftovers in an airtight container for up to 3 days at room temperature or 1 week refrigerated.
What if my crust gets too dark before the filling is done?
Cover the crust with a pie shield or aluminum foil during the final 10-15 minutes of baking to prevent over-browning. For a lighter crust, reduce oven temp to 325°F and bake 5 minutes longer. If the edges brown too quickly, slide a pie dish under the crust to reflect heat upward. The filling needs 30-35 minutes at 350°F, so adjust crust timing accordingly.
Can I substitute the shortbread crust?
Yes! For a no-bake option, use graham cracker crumbs mixed with melted butter (press into dish and chill). For a cookie crust, press 1 cup crushed ginger snaps into the pan. If you prefer a fruit base, try a layer of poached apple slices (simmer apples in cider for 10 minutes, then drain). Just ensure your base is sturdy enough to hold the moist filling—these alternatives work beautifully!