
Desserts
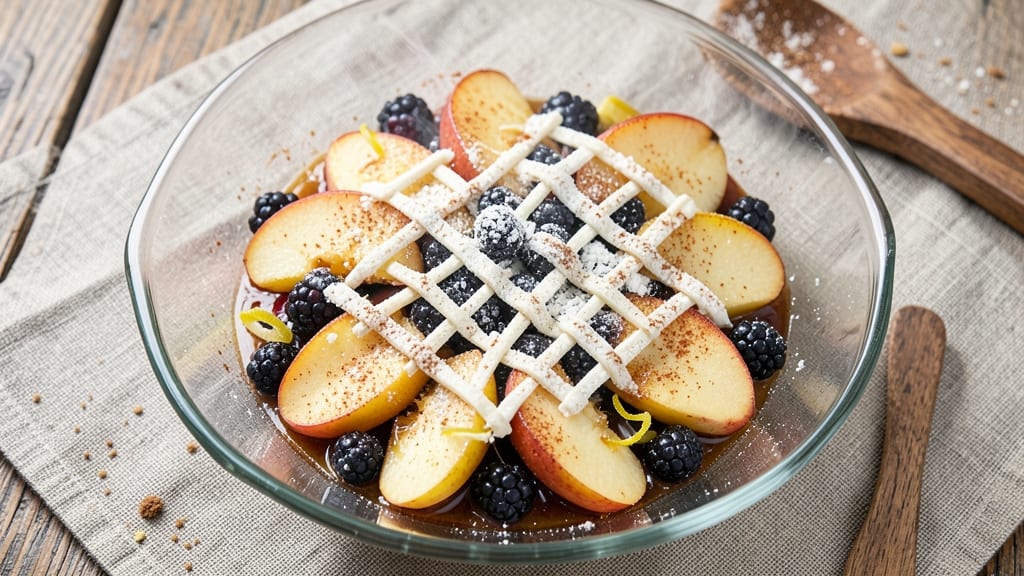
This apple blackberry betty recipe delivers the perfect balance of warm spiced fruit and creamy vanilla topping—ideal for autumn gatherings or cozy weeknight desserts. The secret lies in the buttery crumble topping that becomes irresistibly crisp while the tender fruit underneath stays juicy and fragrant.
I developed this version after years of testing, ensuring every bite combines the tartness of blackberries with the natural sweetness of apples.
The recipe begins with a simple fruit filling of sliced apples and blackberries, lightly spiced with cinnamon and a touch of nutmeg for warmth. A buttery, oat-based crumble topping locks in the flavors while creating a satisfying contrast in textures.
What makes this betty special is the vanilla cream topping, which adds a luxurious finish without overpowering the natural fruit flavors.
By the time it comes out of the oven, you'll have a dessert that's golden and inviting—warm fruit peeking through a crisp crumble, topped with a smooth vanilla cream that melts at the first bite.
The aroma alone will have everyone gathering around the table, and the combination of textures and flavors makes it a crowd-pleaser every time.
Perfect for serving with a scoop of vanilla ice cream or a dollop of whipped cream, this betty is equally at home at family dinners or holiday gatherings. The recipe scales easily, so you can adjust the size to fit your needs without sacrificing quality. Let's get baking!
Ingredients for apple blackberry betty
Six servings of autumn comfort in one golden pan—juicy fruit, crisp crumble, and velvety vanilla cream.
| Ingredient | Amount | Notes |
|---|---|---|
| Apples 🍎 | 4 medium | Honeycrisp or Fuji, peeled and sliced |
| Blackberries 🫐 | 2 cups | Fresh or frozen, thawed if frozen |
| Granulated Sugar 🍚 | 1 ½ cups | For fruit filling sweetness |
| Ground Cinnamon 🌿 | 2 tsp | For warm spice flavor |
| Ground Nutmeg 🌿 | ½ tsp | Freshly grated preferred |
| All-Purpose Flour 🌾 | 2 cups | For crumble topping |
| Old-Fashioned Oats 🌾 | 1 ½ cups | Quick or rolled, not instant |
| Light Brown Sugar 🍚 | ¾ cup | Packed for crumble topping |
| Unsalted Butter 🧈 | 1 cup | Cold and cubed for texture |
| Vanilla Ice Cream 🍦 | 2 cups | For vanilla cream topping |
| Heavy Whipping Cream 🥛 | ½ cup | Whipped for cream topping |
| Pure Vanilla Extract 🍯 | 1 tsp | For vanilla cream flavor |
| Salt 🧂 | ½ tsp | Kosher or sea salt |
The apples are everything here. Honeycrisp or Fuji stay firm when baked, but any crisp variety works—just avoid mealy ones like Red Delicious. Trader Joe's and Whole Foods usually have great local apples in fall. If using frozen blackberries, no need to thaw—they'll release their juices as they cook. Skip the pre-sliced apples though; peel and slice yourself for even cooking. The cinnamon and nutmeg should be fresh—ground spices lose their punch fast, especially nutmeg.
No vanilla ice cream? Whipped cream plus a splash of vanilla extract works in a pinch, though it won't be as rich. The crumble topping gets crispier if you chill the butter cubes before mixing. For a gluten-free version, swap the flour for a 1:1 gluten-free blend and use certified GF oats. The brown sugar in the crumble? Pack it firmly—don't scoop. And trust me on the old-fashioned oats, not quick—it makes all the difference in texture. If you're short on time, the fruit filling can be prepped a day ahead and refrigerated.
This keeps beautifully for 3 days covered at room temperature, though it's best served warm. The crumble stays crisp for about 2 hours after baking, then softens slightly—just reheat in the oven for 5 minutes to revive it. I always make a double batch because it disappears fast. Store leftovers in an airtight container in the fridge, but honestly, it's better fresh. The vanilla cream topping can be made ahead and reheated gently—just don't boil it or it'll curdle.
Why You'll Love This Recipe
- Fruit Salad in Minutes: The apples and blackberries barely need chopping—just a quick core and halve, maybe a rough crush if you’re feeling fancy. I’ve made this while chatting on the phone; it’s that simple.
- Spiced Sweetness Bomb: That dusting of cinnamon and nutmeg? It turns ordinary fruit into something warm and irresistible. The sugar caramelizes just enough to make every bite feel like dessert.
- Picnic or Potluck Hero: Pack it in a jar for a lunchbox, serve it at a BBQ, or take it to a potluck—it’s always the dish people ask for seconds on. No reheating required; just grab and go.
- Zero-Waste Leftovers: Use up those bruised apples or overripe blackberries before they spoil. It’s my go-to when I’ve got a half-eaten fruit bowl sitting on the counter, and it keeps for days in the fridge.
Step-by-step instructions for warm spiced fruit crumble
This cozy dessert comes together in layers—juicy fruit, buttery crumble, and creamy ice cream.
Prepare the Fruit Filling
In a large bowl, combine the 4 medium Apples (peeled and sliced) and 2 cups Blackberries. Sprinkle evenly with 1.5 cups Granulated Sugar, 2 tsp Ground Cinnamon, and 0.5 tsp Ground Nutmeg. Toss gently until the fruit is fully coated and the sugar begins to dissolve slightly. This step ensures every bite has that perfect balance of sweet and spiced flavors.
Transfer the mixture to a 9-inch pie dish or similar baking dish. Press down lightly to create an even layer—this prevents the fruit from bubbling over during baking. The filling should look vibrant and juicy, with the spices evenly distributed throughout. If using frozen blackberries, make sure they're completely thawed to avoid a watery filling later.
Make the Crumble Topping
In a separate bowl, cut the 1 cup Unsalted Butter into small cubes. Using your fingers or a pastry cutter, work the butter into the 2 cups All-Purpose Flour, 1.5 cups Old-Fashioned Oats, 0.75 cup Light Brown Sugar, and 0.5 tsp Salt until the mixture resembles coarse crumbs with pea-sized butter pieces. This texture is key—you want some butter to melt and create that signature crispy, golden topping.
Spread the crumble evenly over the fruit filling, pressing down gently with the back of a spoon. The topping should look like a patchwork of golden crumbs with visible butter flecks. Don't pack it too tightly—this allows the juices to soak up beautifully while keeping the crumble crisp. A lightly browned topping is what makes this dessert irresistible.
Bake Until Golden and Bubbly
Preheat your oven to 375°F. Bake the apple blackberry betty for 35-40 minutes until the fruit is bubbling and the crumble topping is golden brown at the edges. The filling should look juicy and slightly caramelized, with the spices releasing their warm aroma. If the topping browns too quickly, tent loosely with foil to prevent burning while allowing the fruit to cook through.
Remove from the oven and let it cool for 10 minutes before serving. This resting time allows the juices to redistribute, preventing a soggy bottom. The contrast between the warm, spiced fruit and the crispy crumble is what makes this dessert so special. Serve immediately while the fruit is still bubbling hot.
Assemble with Vanilla Cream Topping
While the betty cools slightly, whip the 0.5 cup Heavy Whipping Cream with 1 tsp Pure Vanilla Extract until soft peaks form. This light, airy topping adds a cool contrast to the warm fruit. Scoop 2 cups Vanilla Ice Cream into bowls and top each serving with a generous spoonful of the whipped cream and a portion of the warm betty.
The combination of creamy ice cream, warm spiced fruit, and crispy crumble creates a perfect balance of textures and temperatures. Serve with an extra sprinkle of cinnamon or a drizzle of caramel sauce if you're feeling fancy. This dessert is all about that cozy, comforting feeling—perfect for chilly evenings or special occasions.
Pro Tips For Making Apple Blackberry Betty
- Peel Apples First: I learned this the hard way—peeling before slicing saves time and keeps your Betty from turning into a mushy mess. Apples oxidize fast, and those brown slices? They’ll make your dessert look sad before it even hits the oven.
- Simmer Blackberries Dry: Skip the water bath—toss those blackberries in a dry skillet over medium heat for 2-3 minutes until they burst and release their juices. This concentrates their sweetness and cuts down on excess liquid in your filling, which means a thicker, less watery Betty.
- Don’t Overmix the Batter: Stir just until the sugar and spices are evenly distributed—lumpy is fine. Overmixing develops gluten, and that’s how you end up with a tough, cake-like bottom instead of a tender, custardy layer. Trust me, it’s not worth the extra 10 seconds of stirring.
- Use Cold Butter: Cut that butter straight from the fridge into the dry ingredients, then mix it in with your fingers until it’s pea-sized. Cold butter creates pockets of steam in the oven, which makes your Betty rise beautifully and stay moist longer—no one wants a dry, dense bottom crust.
Make-ahead tips for apple blackberry betty
Fruit Prep Ahead
The fruit filling can be prepped up to 24 hours in advance—this is my favorite time-saver! Store the sliced apples and blackberries with the spices and sugar in an airtight container in the fridge.
The flavors meld beautifully overnight, and the fruit stays fresh. Just transfer it straight to your baking dish when ready to bake—no extra prep needed. 🍎
Crumble Prep Shortcut
Make the crumble topping a week ahead and store it in a sealed container at room temperature. The oats will stay fresh, and the cold butter prevents spoilage. When you're ready to bake, simply sprinkle it over the fruit and bake as directed.
I keep a batch ready in my pantry for spontaneous dessert cravings—it’s a game-changer for busy days. 🧈
Vanilla Cream Make-Ahead
The vanilla cream topping can be whipped up to 4 hours ahead and stored in the fridge. When ready to serve, give it a quick whisk to re-fluff, then gently warm it for 10-15 seconds in the microwave if it’s too thick.
This keeps the texture light and airy without curdling. I often make it the night before so I can focus on baking the betty fresh in the morning. 🥛
Full Dessert Assembly
For the ultimate make-ahead dessert, bake the betty a day ahead and store it in an airtight container at room temperature. The crumble stays crisp for 24 hours, and the fruit flavors deepen.
Just reheat in the oven at 350°F for 5 minutes before serving. Assemble the vanilla cream topping fresh to maintain its lightness. This is perfect for holiday gatherings—just warm and serve! 🌟
Freezing for Later
If you’re planning ahead for months, freeze the baked betty (without the cream topping) in a freezer-safe container for up to 3 months. Thaw overnight in the fridge, then reheat as directed.
The texture holds up surprisingly well, though the crumble will be slightly softer after freezing. The fruit remains juicy and flavorful, making it a great option for last-minute desserts. ❄️
Portioning for Serving
Divide the baked betty into individual portions before serving to keep everything warm and organized. Place each serving in a small ramekin or oven-safe dish, then reheat at 350°F for 3-4 minutes until bubbly.
Top with freshly whipped cream and ice cream—this ensures every guest gets their perfect bite without waiting. It’s also a great way to serve at potlucks or family dinners. 🍽️
Nutrition facts
Frequently asked questions
Can I use frozen blackberries instead of fresh?
Yes, absolutely! Frozen blackberries work perfectly and save money. Just make sure they're completely thawed before mixing with the apples to avoid a watery filling. The texture will be just as juicy and flavorful—no one will notice the difference.
What if I don't have vanilla ice cream?
No problem! Use vanilla bean paste mixed into whipped cream or even coconut ice cream for a dairy-free option. For a lighter version, top with just whipped cream and a drizzle of honey. The warm spiced fruit still shines through.
How do I make this gluten-free?
Swap the all-purpose flour for a 1:1 gluten-free baking blend and use certified gluten-free oats. The crumble will still hold together beautifully—just press it down gently when spreading. The flavor difference is minimal, and the texture remains crisp.
Can I bake this in a smaller dish?
Yes, but increase the baking time by 5-10 minutes to ensure the center cooks fully. A 7-inch dish works well for 4 servings. The key is to press the fruit down firmly so it cooks evenly. The crumble will still get crispy at the edges.
Why is my crumble topping soggy?
Soggy crumble usually means the fruit released too much juice. To fix it, press the fruit down firmly before adding the topping, and bake at a slightly higher temp (375°F) for 10 minutes